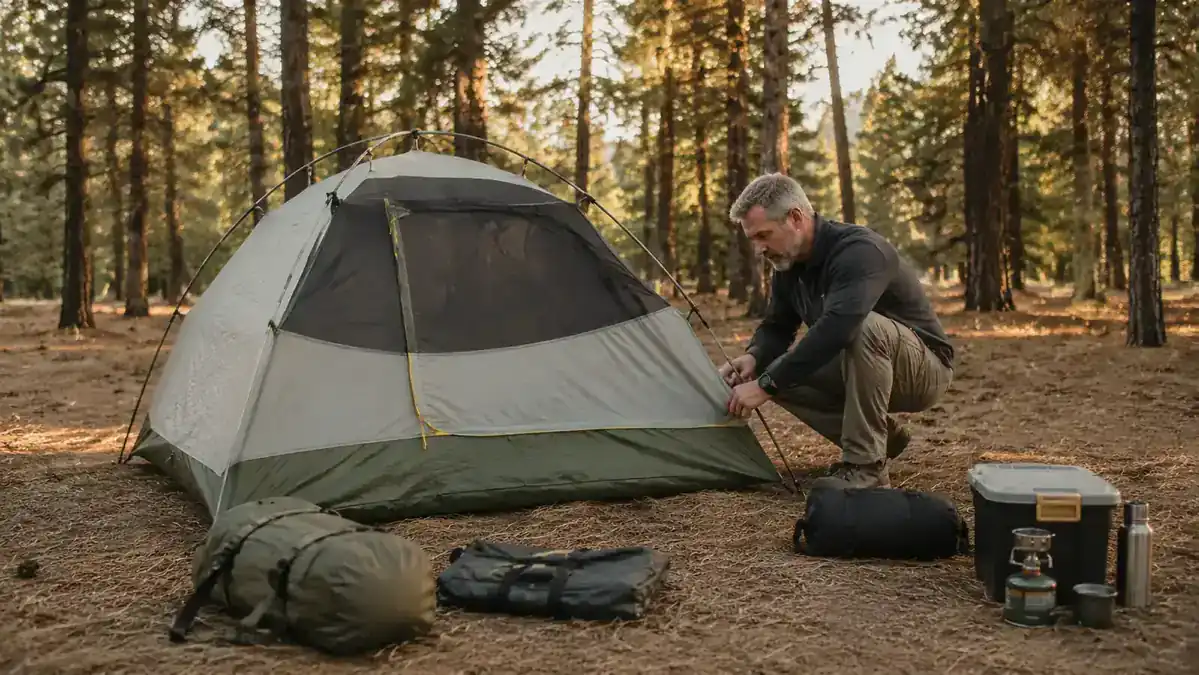
The first time I tried to pitch a tent alone, it took me 40 minutes and a broken fingernail. I had the instructions open on my phone, the poles kept slipping out of the grommets, and by the time I got the rainfly on, the sun was down and I was setting up camp by headlamp with my headlamp on the wrong setting. That was not a great start to a weekend deer hunt in northern Michigan.
I've since pitched hundreds of tents solo. Maybe more. Car camping with the family, hunting base camps, backpacking weekends, one memorable afternoon in Georgia where the wind was doing 25 mph and a line of storms was fifteen minutes behind me. I've got a system now. Once I dialed in the sequence, 8 minutes became normal. Under 5 is possible when the site cooperates. And I've been running that system with the CORE dome tent (ASIN B0DPNFBQMB) for the past couple of years. It's a tent built to be set up fast, and the steps below will get you there.
If you don't have a dome tent that cooperates solo, fix that first.
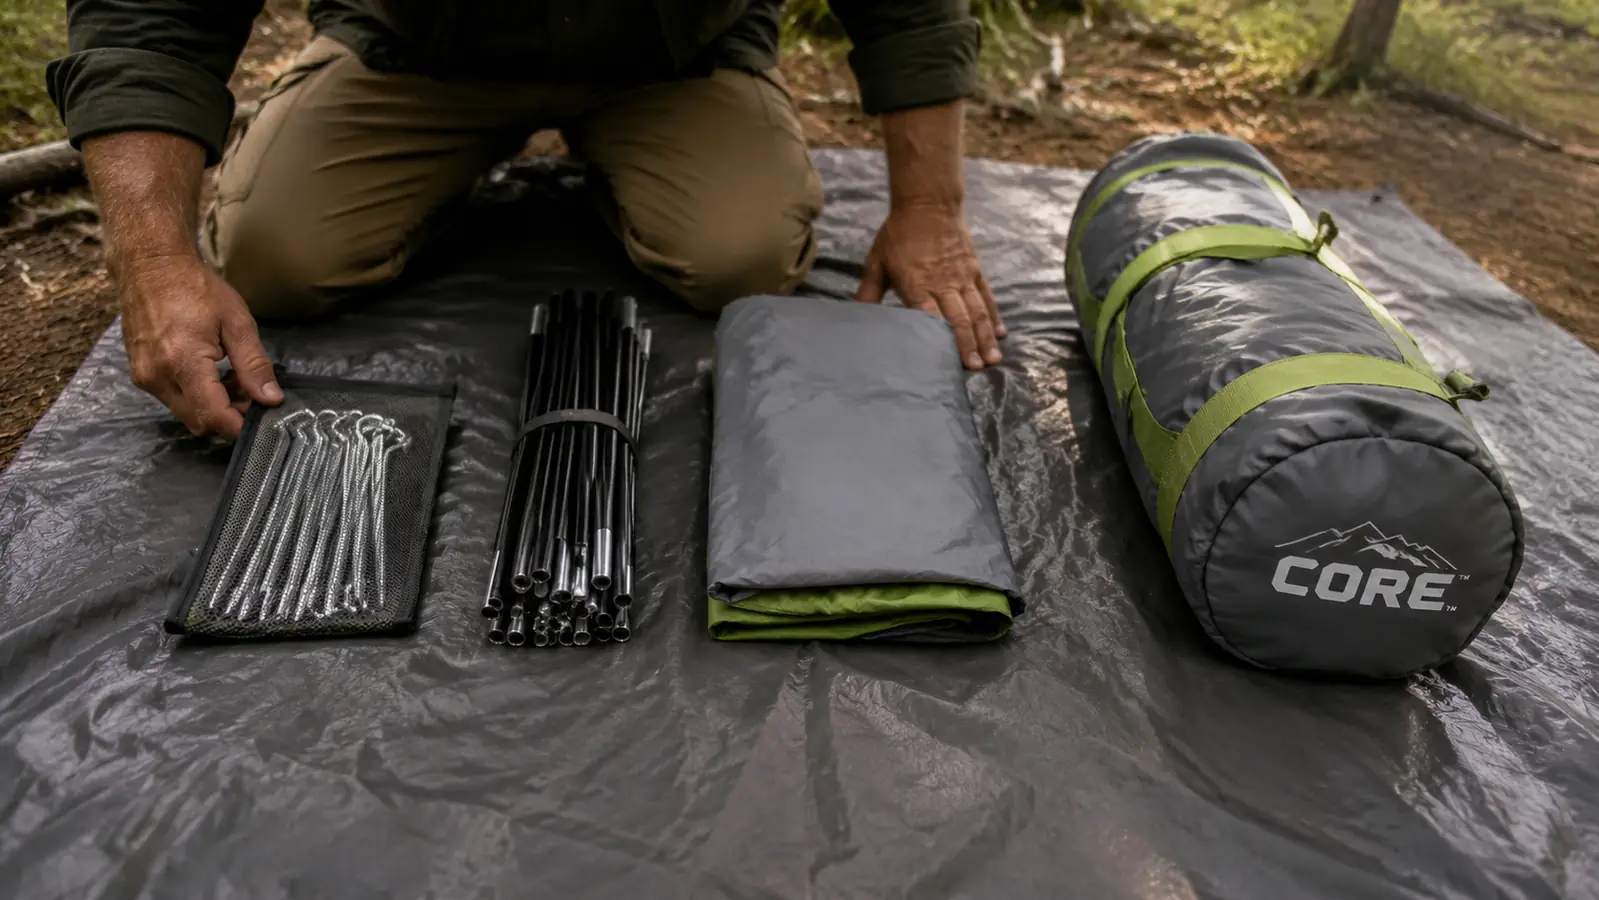
The CORE dome tent has flexible poles, color-coded clips, and a sleeve-free clip-on rainfly. It's the reason this guide works in under 10 minutes. Check current pricing before you read another word.
Amazon Check Today's Price on Amazon →Before You Touch the Bag: Site Selection and Gear Layout
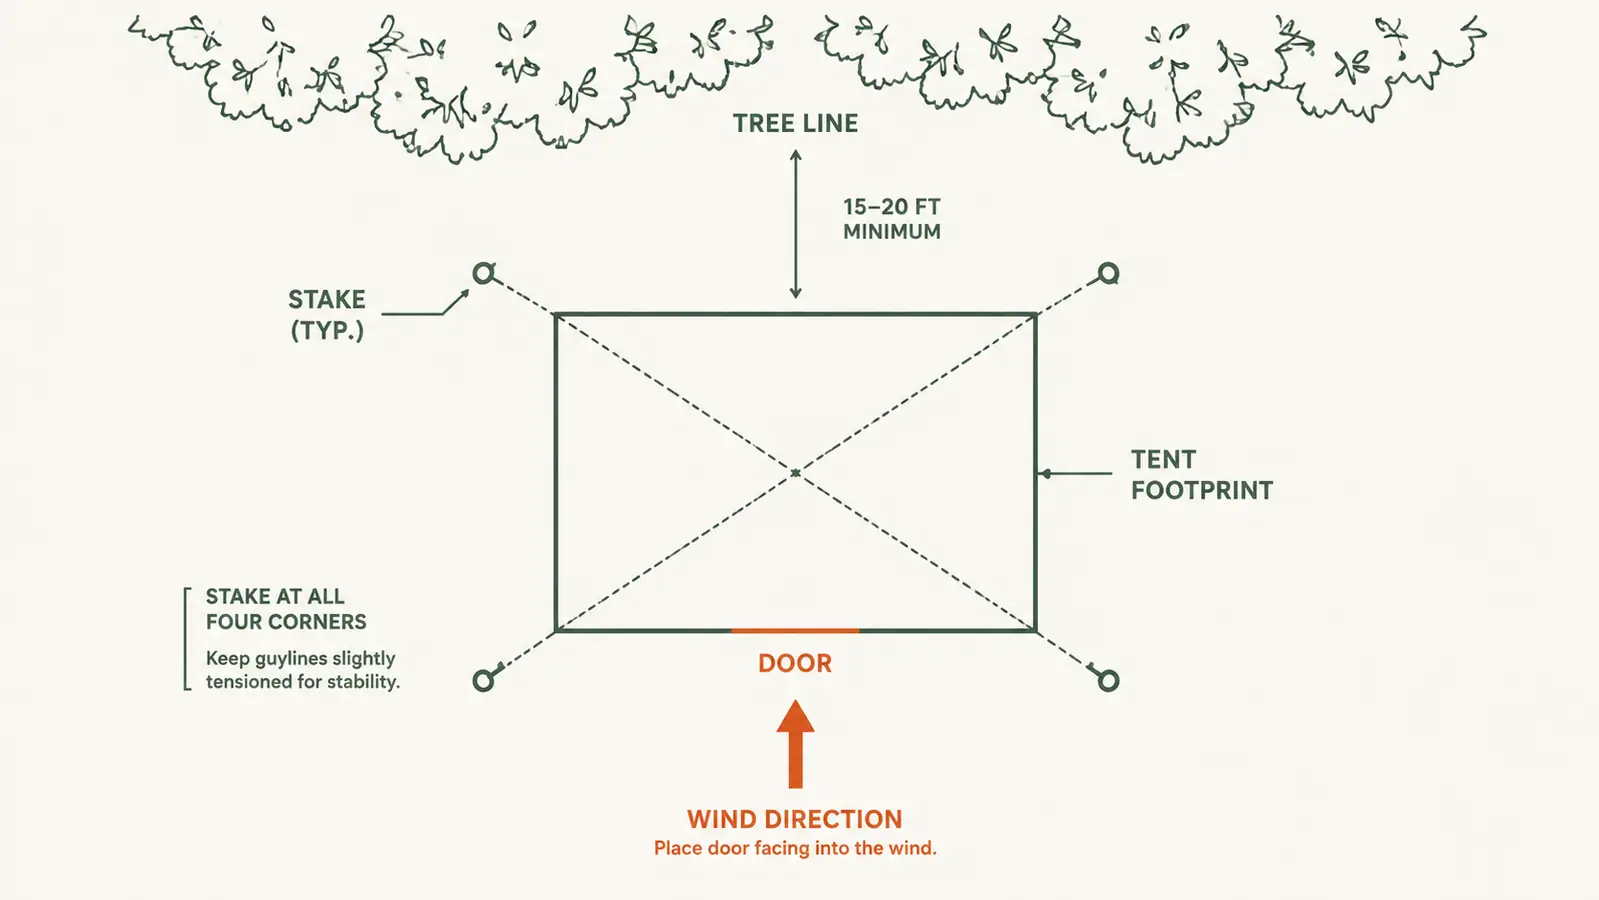
Most people fail at tent setup before they even open the bag. They drop everything in the middle of a clearing, yank stuff out, and then discover the site is sloped, or covered in pine cones, or they've got the tent oriented door-first into the wind. A bad site choice costs you 15 minutes minimum and your sleep quality for the whole night.
Walk the site first. Clear rocks and sticks from your footprint area. Find the direction the wind is coming from, then plan to orient your door perpendicular to it, not facing into it. If you're camping near water, pick slightly elevated ground so any overnight rain drains away from you. Once you've got your spot confirmed, lay out a ground cloth or footprint if you use one. That flat rectangle becomes your staging area.
Now pull everything out of the bag and lay it in front of you in this order, left to right: stakes, poles, the tent body, then the rainfly on top. Stakes on the far left because they go in first. Rainfly on the far right because it goes on last. This sounds obvious but if you dig through a pile trying to find the right pole section while the wind is moving your tent body around the site, you'll understand why order matters. Spread the body out flat, door facing your preferred direction, and put a stone or your boot on one corner so it doesn't blow away while you work.
Step 1: Stake Two Corners Before You Touch a Pole
This is the biggest thing I changed once I started doing this regularly solo. Most people assemble the poles first and then fight the tent body while trying to get corners staked. When it's windy, that fight is real. You're chasing a flapping tent with two pole sections in your hand and it's miserable.
Instead, stake two opposing corners first. I do the two corners farthest from me, driving stakes at a 45-degree angle away from the tent body, not straight down. Straight down stakes pull out. Angled stakes hold. Now the tent can't go anywhere. The body is anchored and you have both hands free to work the poles.
On dome tents with corner webbing loops rather than sewn-in rings, make sure your stake goes through the loop cleanly. If it's muddy, thread the loop before driving so you're not trying to push a stake through a loop that's got dirt packed in it.
Step 2: Assemble and Thread the Poles
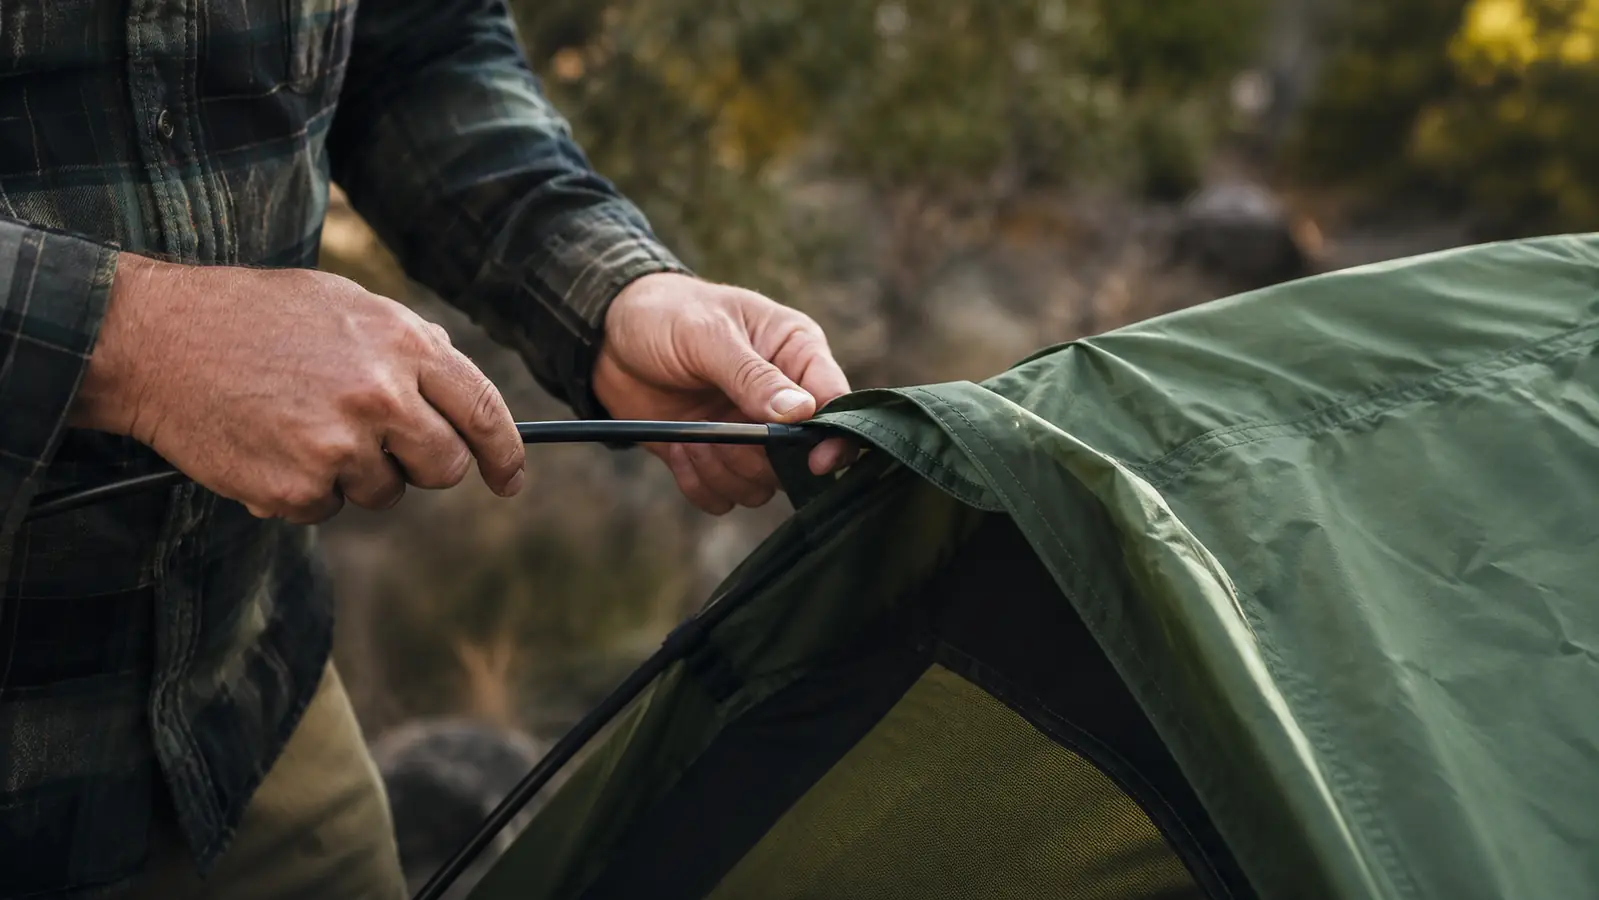
Most dome tents use shock-corded fiberglass or aluminum poles in sections. Snap them together starting from the center section out. Don't let the bungee tension pull sections together too fast or they'll whip and you'll chip a ferrule. Hold each section, guide the next into it, and then let the bungee do the last inch of work.
The CORE dome tent uses a clip system rather than pole sleeves. That matters because threading a sleeve on a windy day while the body is moving is a two-person job. Clips just snap onto the pole from the outside. You hold the pole across the tent body, clip from one side to the other, and the body hangs from the arc. If your tent uses sleeves, do the same motion but thread the whole pole through the channel in one continuous push from the far end.
Once both main poles are clipped or threaded, cross them at the center and bow each one into its corner grommet. The tent should start taking shape now. Push the pole tip into the grommet firmly. A pole tip that isn't seated fully will pop out under load, and usually at the worst possible moment. Check both ends of both poles before moving on.
If your tent has a ridge pole or vestibule pole, do those after the main structure is up and stable. Vestibule poles usually just peg into the rainfly, so you can wait until the fly is on.
Step 3: Stake Out the Remaining Corners and Adjust the Pitch
With both poles in and the tent structure standing, stake the remaining two corners. You should feel the tent want to settle into a consistent dome shape. If it's lopsided, check that your pole tips are fully seated. Adjust corner stakes to pull the base taut without warping the shape. The floor should be flat, not puckered.
Pitch is everything for weather performance. A sloppy tent floor with gaps at the base is where ground moisture comes in. A properly staked base also keeps the walls away from your sleeping bag so condensation doesn't soak through. Take 90 seconds here and don't rush it. On cold nights, a poorly pitched tent body means you wake up with a wet sleeping bag against the wall, and that ruins a trip.
The sequence is everything: stake first, pole second, fly last. Once I locked in that order, setup went from 40 minutes of frustration to 8 minutes of routine. Now I do it the same way every single time, whether it's dead calm or blowing sideways.
Step 4: Attach the Rainfly
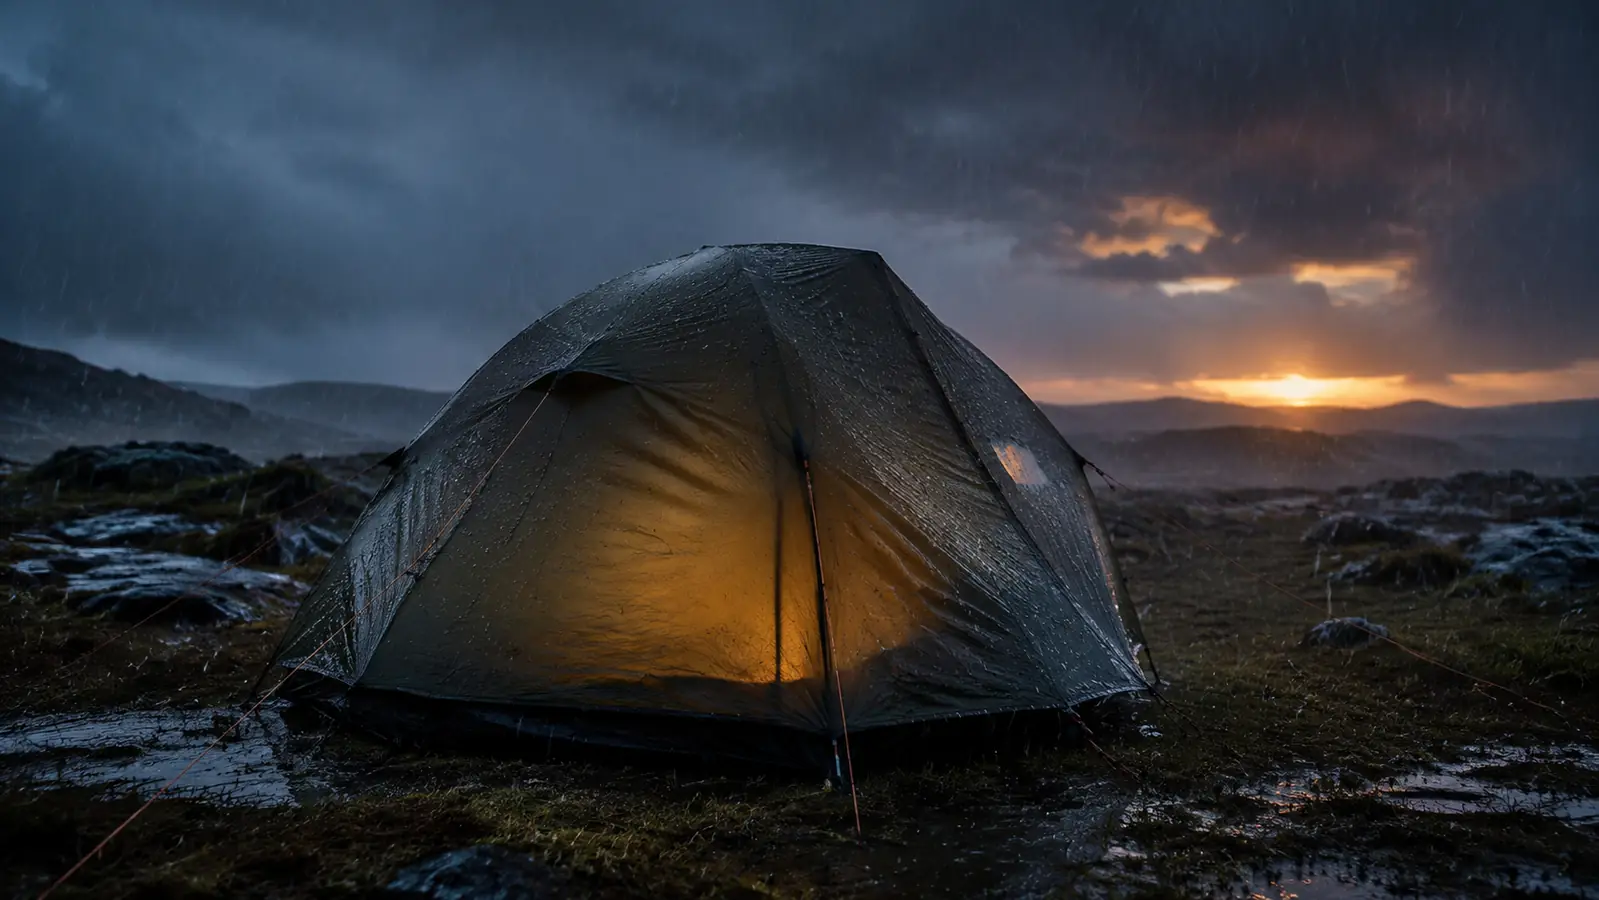
Never skip the rainfly, even if the forecast is clear. Weather in the field can turn in 30 minutes and clear skies at sunset can mean heavy dew by 3am that soaks the mesh roof straight through. The fly goes on every time.
Lay the fly over the tent and orient it so the door aligns with the tent door. Most flies have a visible front and back based on the vestibule placement. The CORE fly drops over the poles and has corner grommet attachments that connect to the same pole tips as the tent body. Clip or loop the fly into place at each corner first, then work the Velcro wraps or buckle straps around the poles at the top cross. Pull the fly down and taut. It should drape the tent structure with clearance between the fly and the mesh inner roof. If the fly is touching the mesh, condensation transfers. Adjust the tension until there's consistent air gap.
In wind, put your knee on the fly while you work. Nothing slows you down like wrestling a nylon sail over a tent structure when it's gusting. Once the corner clips are in, the fly has enough grip to stay while you do the remaining fasteners.
Step 5: Run Guy Lines and Do a Final Tension Check
If your tent has guy lines, use them. I know most campers in calm weather just skip this step and go find firewood. Don't skip it if there's any chance of wind overnight. A properly guyed tent handles 40 mph gusts without comment. The same tent without guy lines will flap loud enough to keep you awake and can invert in a real storm.
Guy lines clip or tie to loops on the fly, then stake out at an angle away from the tent. Tension them so the fly is pulled taut but not distorting the tent body shape underneath. Then do a full lap. Push on the structure at the midpoint of each wall. The tent should flex and spring back, not shift on the ground. Check every stake is fully driven and angled correctly. Anything that moves, reset it now before you unpack your sleeping bag and pad.
The whole sequence from unzipping the bag to running the final tent check should take under 10 minutes on a cooperative site. On a rough site with wind and rain, maybe 12 to 15. Either way, you're not spending 40 minutes on your knees in the dark.
What Else Helps: Tent Choice Matters as Much as Technique
The steps above work for any dome tent, but not all tents make them easy to execute. If you're fighting a tent that has 11-section poles, sleeve threading, and hooks that require both hands to clip while the fabric flaps in your face, no technique fixes that. The gear either cooperates with solo setup or it fights you.
The reason I use and recommend the CORE dome tent for this workflow is that it was clearly designed with one person in mind. The color-coded pole tips and clip system mean you're not guessing which pole goes where or trying to thread a narrow sleeve under tension. The rainfly has dedicated attachment points at each corner instead of a confusing loop system. And if you've got questions about the dome format itself, the dome vs. cabin tent breakdown on this site walks through exactly why dome geometry is inherently easier to pitch solo. For a deeper look at how this tent handles a full season rather than just the setup, read the CORE tent honest review where I cover weatherproofing, interior space, and the few things I'd change.
One more thing worth saying: practice at home before you need it in the field. Pitch your tent in the backyard on a calm afternoon the week before your trip. You'll immediately find whatever clips are awkward, whatever stake doesn't drive right, and whether you're missing a piece. I've shown up at a campsite and discovered I left a pole section on the garage floor. Do that discovery at home, not at dark-thirty with a headlamp.
Tent cooperates, setup is fast. Wrong tent, this guide only helps so much.
The CORE dome tent is the one I come back to for solo setups. Clip system, color-coded poles, rainfly that drops on in under two minutes. Over 4,400 reviews on Amazon and it's priced under $100. Check today's price and see if it's in stock.
Amazon Check Today's Price on Amazon →